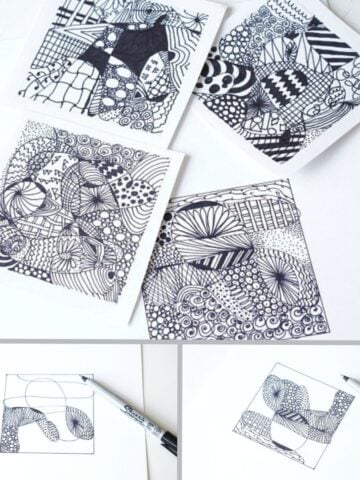
Okay, I have been wanting to figure out how to draw zentangle basket weave patterns for a while now. I've toyed around with a couple of super basic basket weave patterns, but I wanted to try and figure out how to create a more intricate design. And, I knew that once I figured it out I would share it with you! You know how much I'm loving creative easy zentangle-inspired patterns and designs.

Disclosure: There are Amazon Affiliate links in this article which means, at no additional cost to you, we could receive compensation for our recommendations. You can read our full disclosure policy on our Disclosure Page for more details.
Okay, what is a zentangle? Originally, I thought that a zentangle was just doodling…I was wrong. The zentangle method is a trademarked process based on a theory developed by founders Rick Roberts and Maria Thomas. You have undoubtedly seen this patterning art form before, it has become incredibly popular. “ZEN” means calm, and “TANGLE” means a collection of overlapping patterns. ZENTANGLE is the bringing together of the calm and the pattern. It was originally based on using a 3 ½ inch square of heavy stock paper and a black fine marker and various patterns that turn into a creative piece of art. We didn’t follow the exact Zentangle method, but we had a lot of fun experimenting.
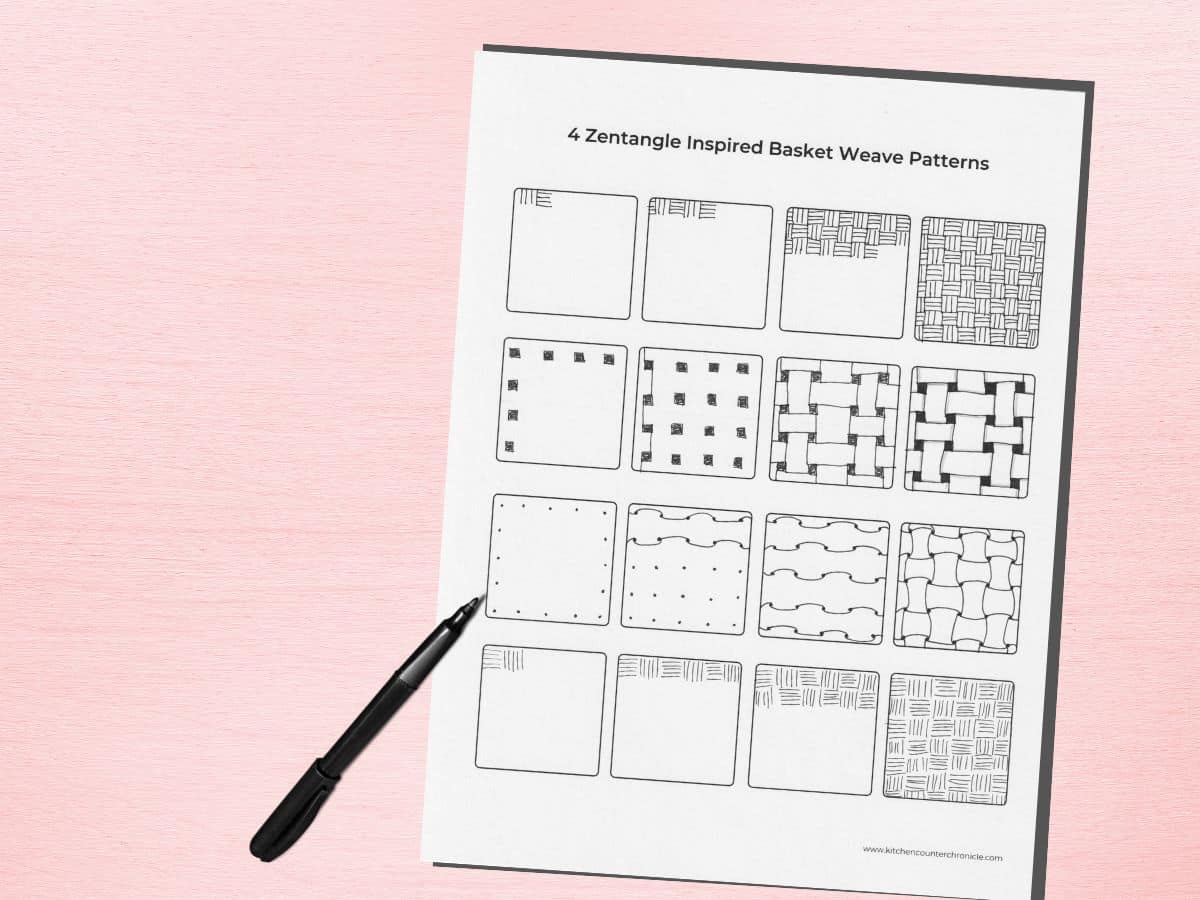
4 Zentangle Basket Weave Patterns
our printable 4 basket weave patterns worksheet
our blank zentangle drawing worksheet
ultra-fine tip black pen
white cardstock
pencil with an eraser
Before I get into explaining each different pattern, I will start by setting you up for success. You will want to draw on cardstock or a zentangle-specific paper. A paper with a smooth surface will give you the best possible results and will be the least frustrating. Next, you will want to work with an ultra-fine-tipped pen. The set I've suggested, above, is great because it has various tip sizes. You can experiment with which tip size you like best. Don't be afraid to start out using a pencil. Some of these patterns can get a little confusing and starting off with a pencil is totally acceptable.
Finally, the best part (for me) about doodling is how meditative it is. So, be sure to put on a favorite playlist and give yourself some time to sit and draw. This is what makes this activity so great for tweens and teens. Because everyone needs some time to chill. Okay, let's get into these basket weaves.
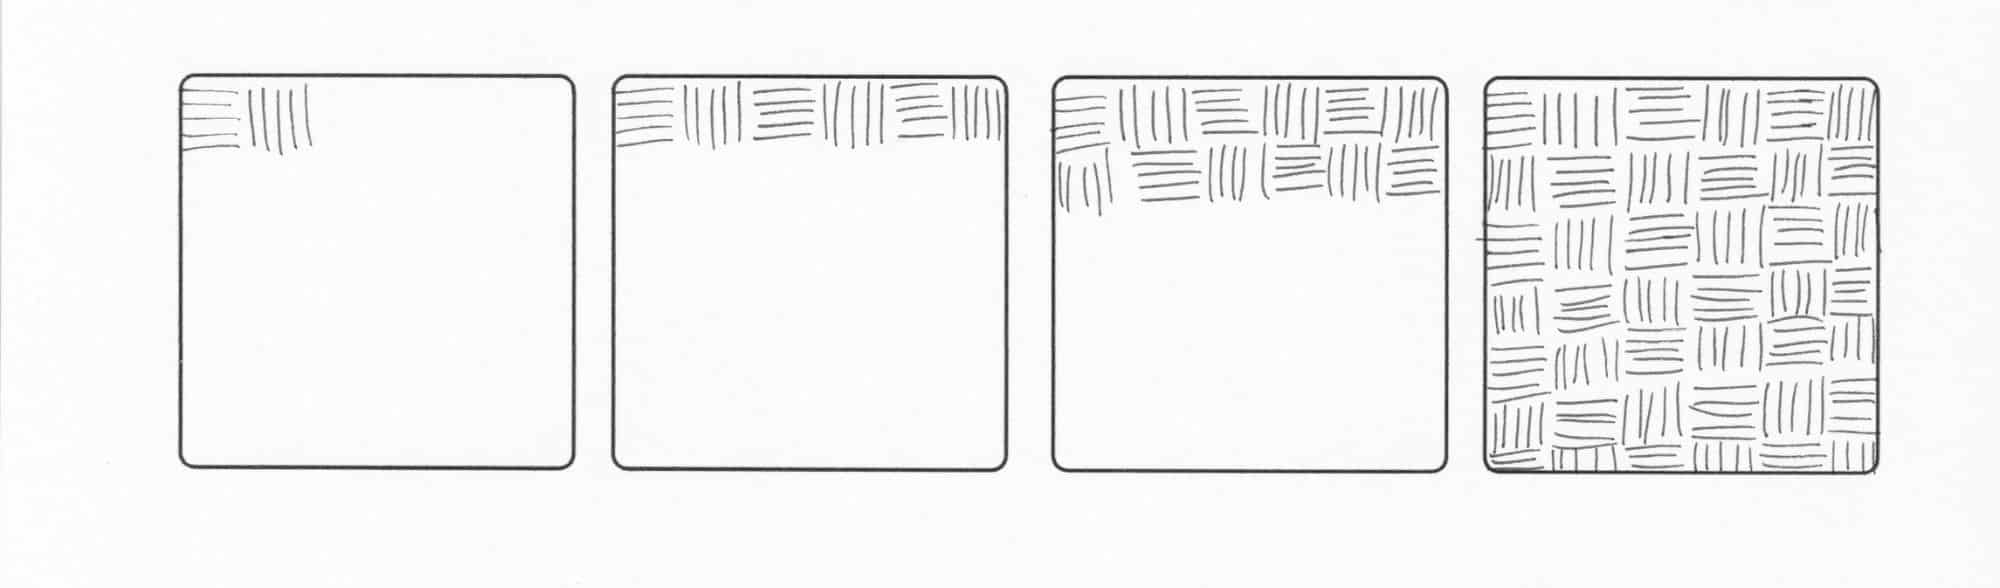
Easy Basket Weave Pattern
The first zentangle-inspired basket weave pattern is the easiest. For this pattern, you will be combining short lines, in alternating directions.
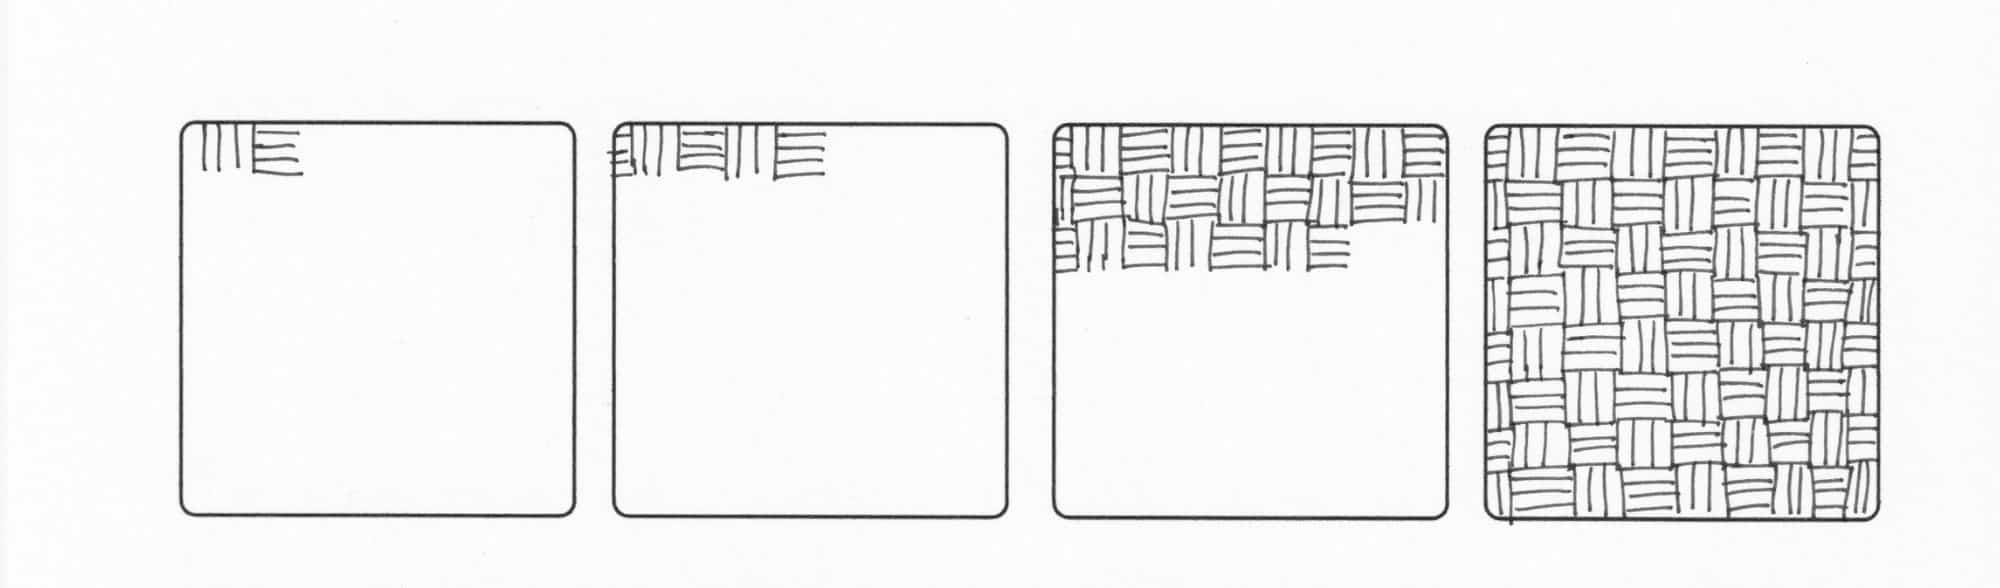
- start in the top-left corner with 5 short horizontal lines, that are all the same length
- then add 5 short vertical lines beside the horizontal lines. In essence, you are creating little squares of evenly spaced lines.
- carry on across the top of the space and then move below the set you started with and repeat.
- keep on repeating until the entire space is filled.
- you will see the basket weave evolve as you draw more and more lines.
- I love how free and simple this basket weave is. We've all probably drawn something like this pattern in our lives.
More Challenging Basket Weave Zentangle-Inspired Pattern
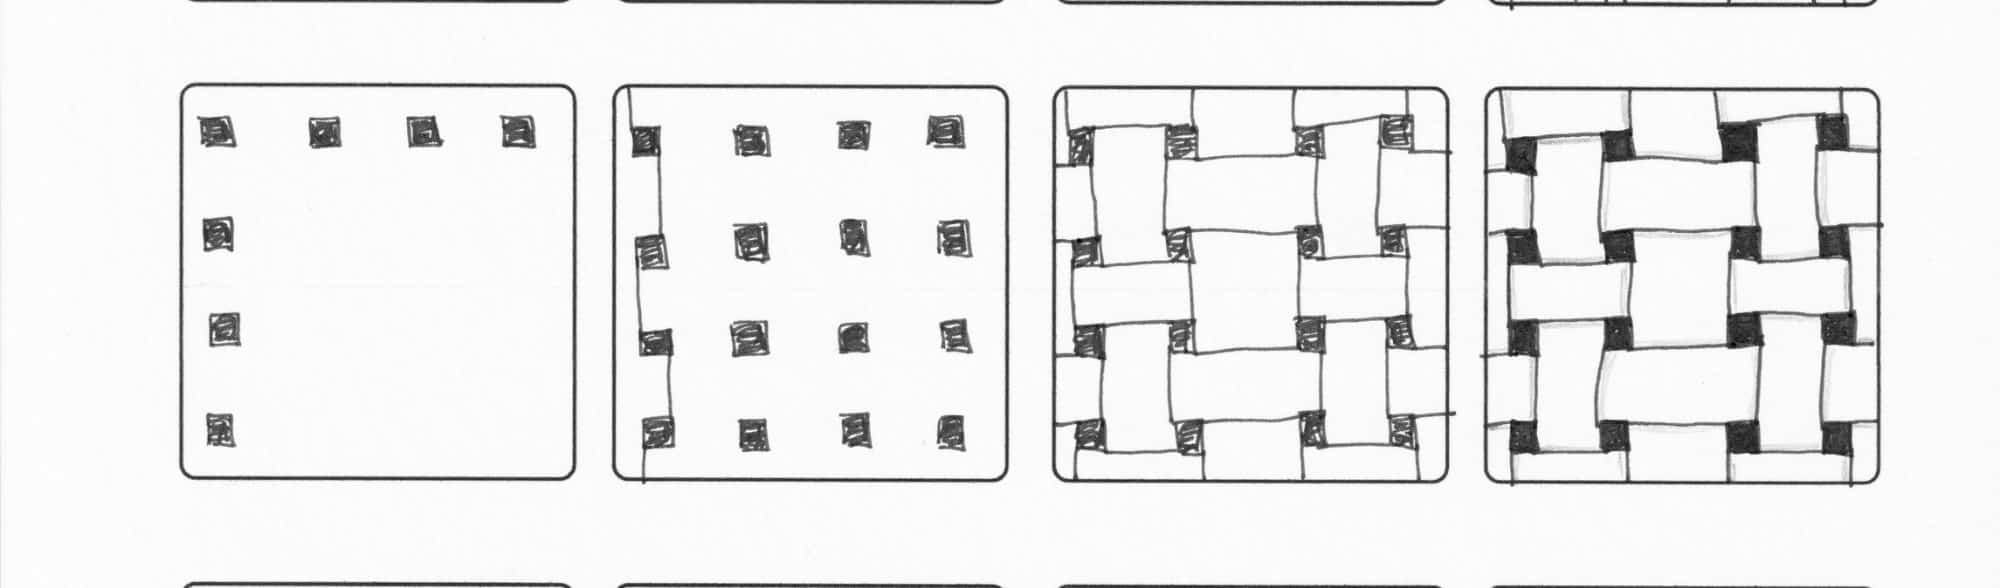
Next up is a slightly more complicated basket weave zentangle pattern. Take your time and keep trying and playing around with it, you'll get there.
- start by drawing a grid of small solid, small squares that are evenly spaced on your page, draw at least 4 x 4 (it's best to start practicing with my blank zentangle worksheet)
- now add straight lines that connect the squares (starting with the top-left square) alternating vertical lines from the left side of the first square in the column, to the left side of the square below
- then draw a vertical line from the right side of that square to the right side of the square below
- then switch to draw a vertical line from the left side of that square to the left side of the square below - connecting the squares vertically
- move onto the second column of squares and connect them in the opposite position as the first column
- so, start by adding a straight line that connects the squares on the right side of the top square to the right side of the square below, and so on
- once you have all the vertical lines drawn for each column, it is time to take care of the horizontal lines.
- the horizontal lines will also alternate - between the top and bottom of the squares
- since the first two squares in the top row (top-left squares) have vertical lines on the "outsides" or the left/right combination, you will draw the horizontal line on the top of the squares, connecting the two squares in the row
- now move to the right and these two squares have vertical lines on the "insides" or the right/left combination, you will draw the horizontal line on the bottom of the two connecting squares
- you will continue this alternating top and bottom across the squares and for all the rows of squares
- as you draw the horizontal lines the basket weave will come to life
- finish the pattern by going back and darkening the squares, you can use your pencil to add shading too, if you like
More Challenging Basket Weave Pattern to Draw
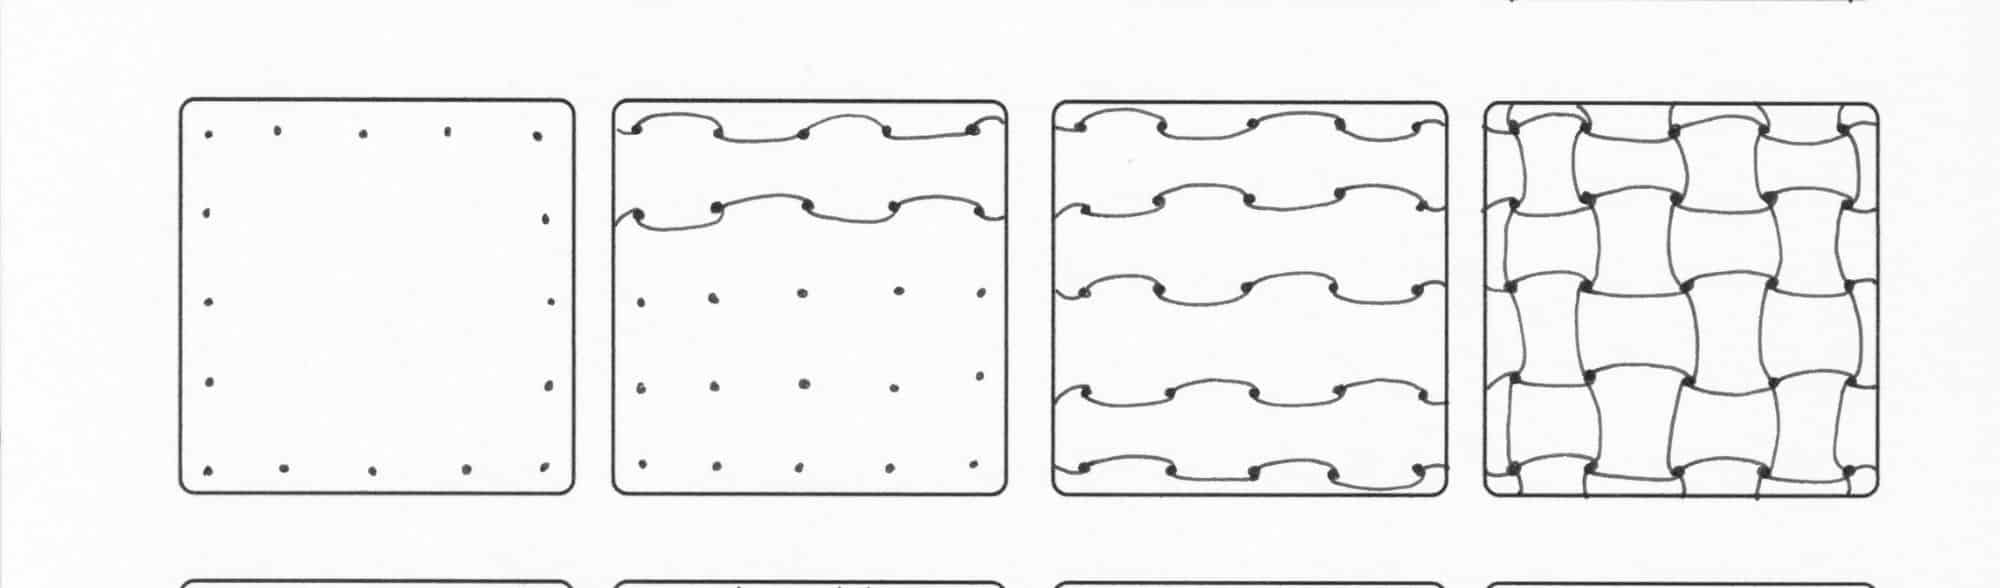
Okay, I found this basket weave the most complicated to figure out, but once you have the previous one figured out it is the same basic principle...just using dots instead of squares.
- once again, begin by drawing a grid of evenly spaced solid, small dots, draw at least 4 x 4 (once again, it's best to start practicing with my blank zentangle worksheet)
- as with the previous pattern, you are going to add connecting lines, however, they will not be straight lines, they will be lines that have a slight arch and we are moving horizontally, not vertically.
- again, start with the dot that is in the top-left corner. add a line that arches from the top-left side of the first dot in the row to the top-right side of the dot beside it in the row. making a low rainbow arch from one dot to the next
- now add an arching line from the bottom-left side of the second dot to the bottom-right side of the third dot in the row
- then add an arching line from the top-left side of the third dot to the top-right side of the fourth dot
- carry on adding connecting lines alternating the top and bottom of the dots - move down to the next row of dots and connect to the opposite sides of the dots as the previous row
- so, in the second row, you will connect the bottom-left of the first dot to the bottom-right of the second dot, then the top-left to the top-right and so on across the row (this can seem very confusing, just keep experimenting)
- when all the rows are done, it is time to work on the columns - for this, I found it easier to turn the page so I was working with horizontal lines, again
- turn your page and again start with the top-left dot. That top-left dot should have lines connecting it on the "outside" of the dots, which means you will draw arched lines connecting the dots from the bottom-left of the first dot to the bottom-right of the second dot
- move to the right, and alternate to connecting from the top-left to the top-right
- always keep in mind that you are doing the opposite of how you connected the previous dots and the pattern will emerge and make sense
- finish by going back and darkening the dots and use a pencil to add some shading, to accentuate the weave
- honestly, I had to try this pattern a number of times to get it right - totally work with a pencil first
Super Simple Zentangle-Inspired Basket Weave Pattern
Okay, this basket weave design is all about simplicity. This might look a little "messy" at first, but if you trust the process you will see the pattern come to life as you add more rows.
- start with 5 short horizontal lines, unlike the first pattern we drew this one is much more casual and the lines should be unevenly spaced and of different lengths
- then add 5 short vertical lines beside the horizontal lines. Again, you are creating little squares of lines.
- carry on across the top of the space and then move below the set you started with and repeat.
- keep on repeating until the entire space is filled.
- the basket weave will evolve as you draw more and more lines. In the end, you will have a more casual basket weave pattern
Okay, what did you think of these 4 doodled basket weave patterns? These patterns will work inside any of your tangles. Have fun experimenting with drawing them on a diagonal or in tight spaces versus larger spaces. The possibilities are endless. As always, doodling or zentangling, or whatever you want to call it, is all about giving yourself some time to relax, and unplug from everything that is going on around you and be creative. So enjoy!
I'm working on creating a video series with these patterns, I'll be sure to come back and update this post when the videos are up.
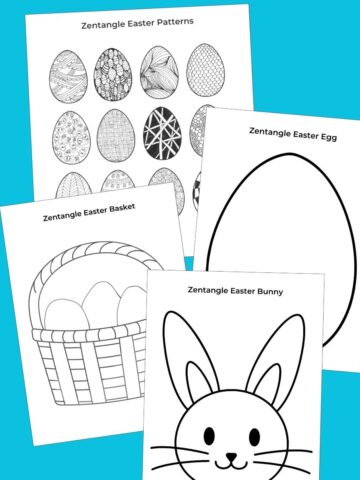
Be sure to check out all of our creative easy zentangle patterns and tips and tricks too!
Make sure you are following along...
FOLLOW KITCHEN COUNTER CHRONICLES ON
SUBSCRIBE TO KITCHEN COUNTER CHRONICLES TO HAVE OUR DELICIOUS RECIPES, FUN CRAFTS & ACTIVITIES DELIVERED DIRECTLY TO YOUR INBOX.