We love digging in the garden and learning from our gardening experiences. There are so many interesting spring and summer science experiments that involve plants and flowers. Remember when we dyed carnations? We've shared so many cool STEM activities, summer STEM activities and winter STEM activities over the years. This science experiment combines our love of plants and flowers with our interest in science.
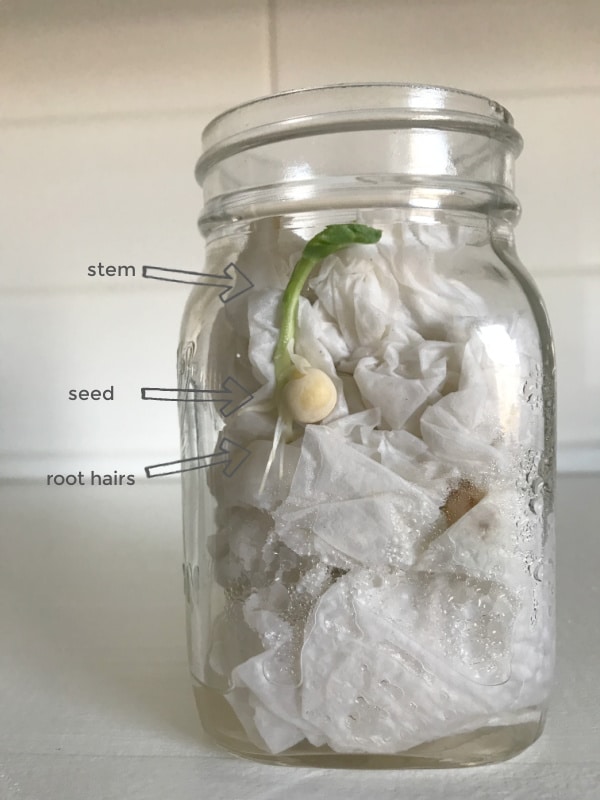
When you plant a seed in the soil you miss out on all the cool stuff that is happening in the dirt. Waiting to see the seedling pop out of the soil is only half of what is going on when a seed germinates and starts to grow.
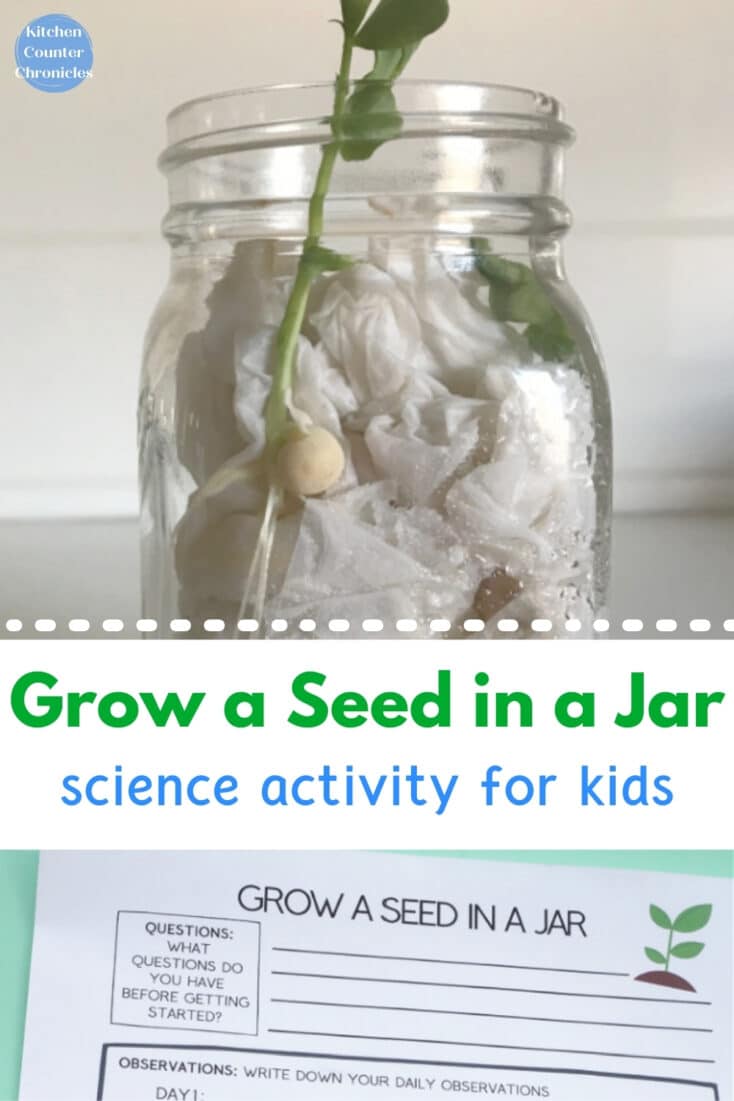
Grow a Seed in a Jar - Science Activity for Kids
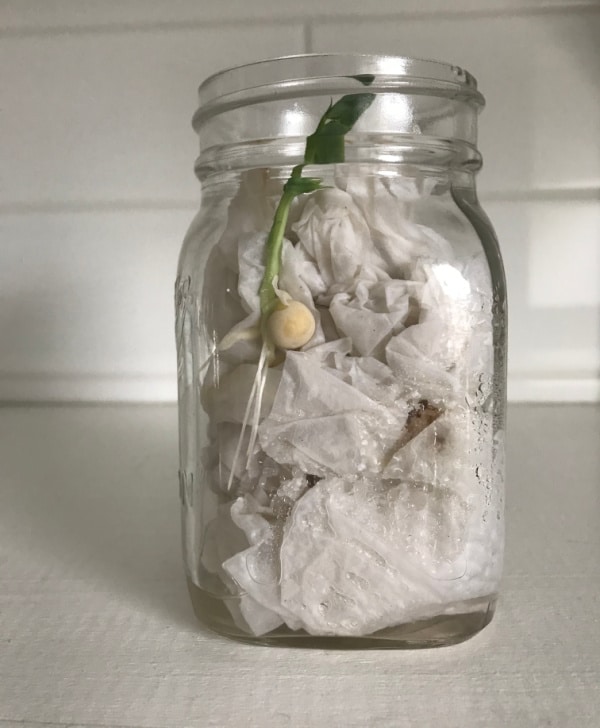
clear jar - we used a mason jar
clean paper towel
seeds - preferably a bean or pea seed (we used sugar snap peas)
water
Grow a Seed in a Jar worksheet
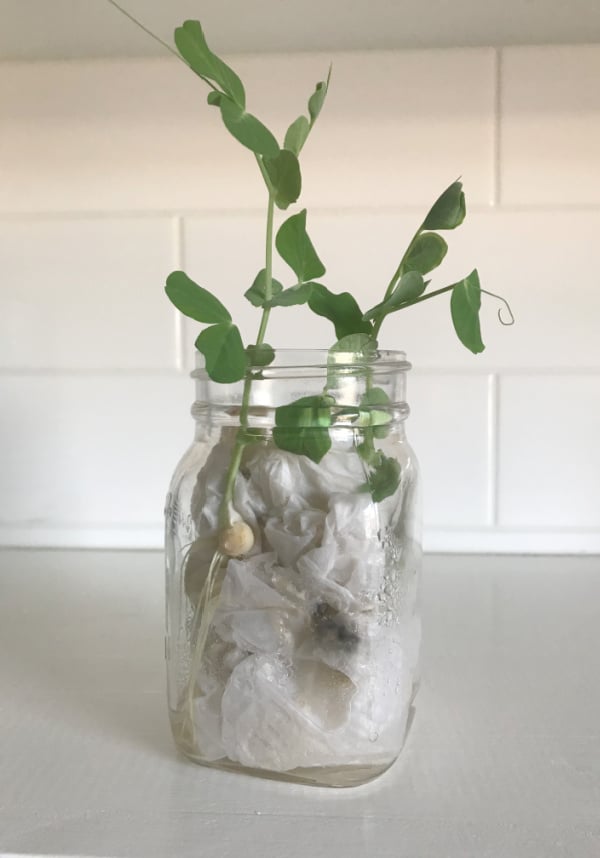
We wondered what would happen if we placed a seed in a mason jar and we could watch what is happening below the soil's surface. This is such an awesome science activity for kids of all ages. It will spark many scientific questions.
- What do plants need to grow? Sunlight and water
- What direction will the plant grow?
- What will we see first - the roots or the plant's stem?
- How long will it take for the plant to grow out of the jar?
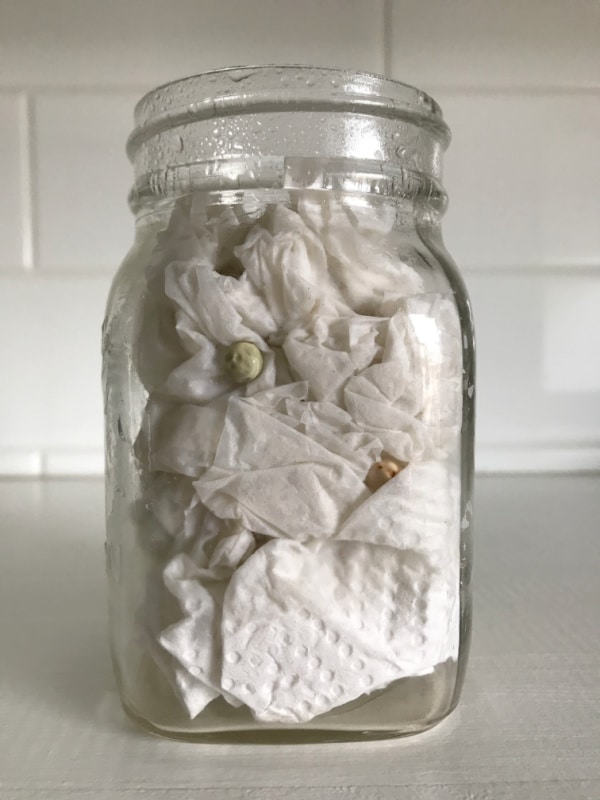
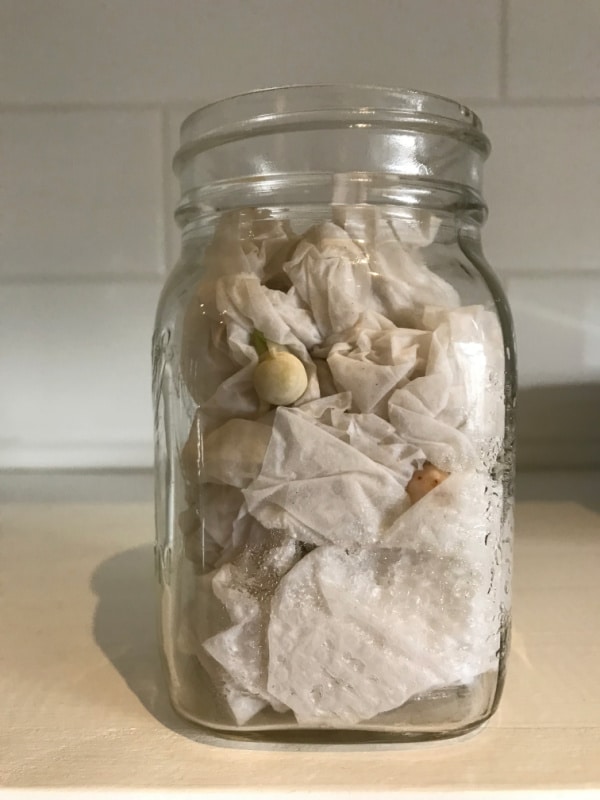
Place the seed in the jar. Place the seed at the side of the jar, so you can see the seed and watch it grow. Again, don't place it in a spot that is too tightly packed. We placed our seeds about halfway down the jar.
Now, place the jar in a sunny spot. You don't want it to be too sunny, or the jar will dry out too quickly. Indirect sunlight is best. And, now we wait...patiently. Be sure to add water to the jar as the paper towel start to dry out. Be gentle. If you dump the water in too quickly you will displace the seed...be gentle with the water.
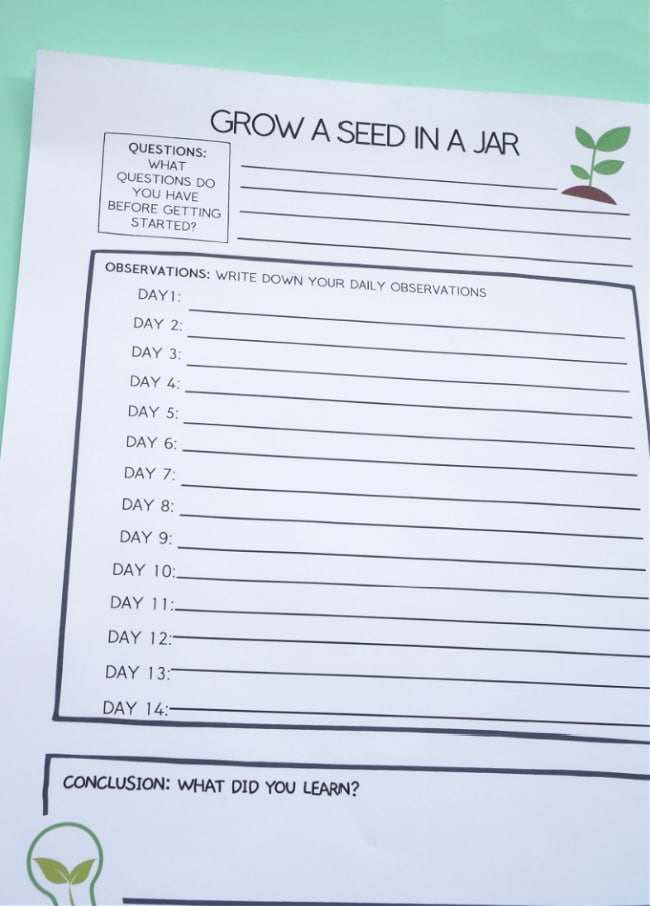
It's a great time to pull out the seed germination log and make note of the date you started the experiment. Then each day you can write down your observations and track your watering schedule.
What's going to happen?
At the bottom of your worksheet, there is a spot for you to write your conclusions. What were the answers to the questions you first posed? Write anything interesting you may have observed in this section.
Related Posts
Make sure you are following along...
SUBSCRIBE TO KITCHEN COUNTER CHRONICLES TO HAVE OUR DELICIOUS RECIPES, FUN CRAFTS & ACTIVITIES DELIVERED DIRECTLY TO YOUR INBOX.
FOLLOW KITCHEN COUNTER CHRONICLES ON
FACEBOOK:: PINTEREST :: TWITTER::INSTAGRAM