I first wrote this article back in 2014!? Well, I'm still making ice ornaments and I've added an update at the end of the article with yet another example of these lovely winter ornaments.
I really do try to find creative ways to have fun in the cold weather. Growing up in Canada, and raising kids here, I've learned that it is going to be cold and we better find ways to have fun with it or it's going to be a long cold winter indeed. We have actually been having a lot of fun using the cold weather to our advantage...making beautiful ice ornaments. A fun winter craft project that will show the kids the beauty of the cold.

It only made sense that if it feels like a freezer outside...why not have fun freezing things outside. We gathered up some supplies and set to work making ice ornaments.
How to Make Simple Ice Ornaments
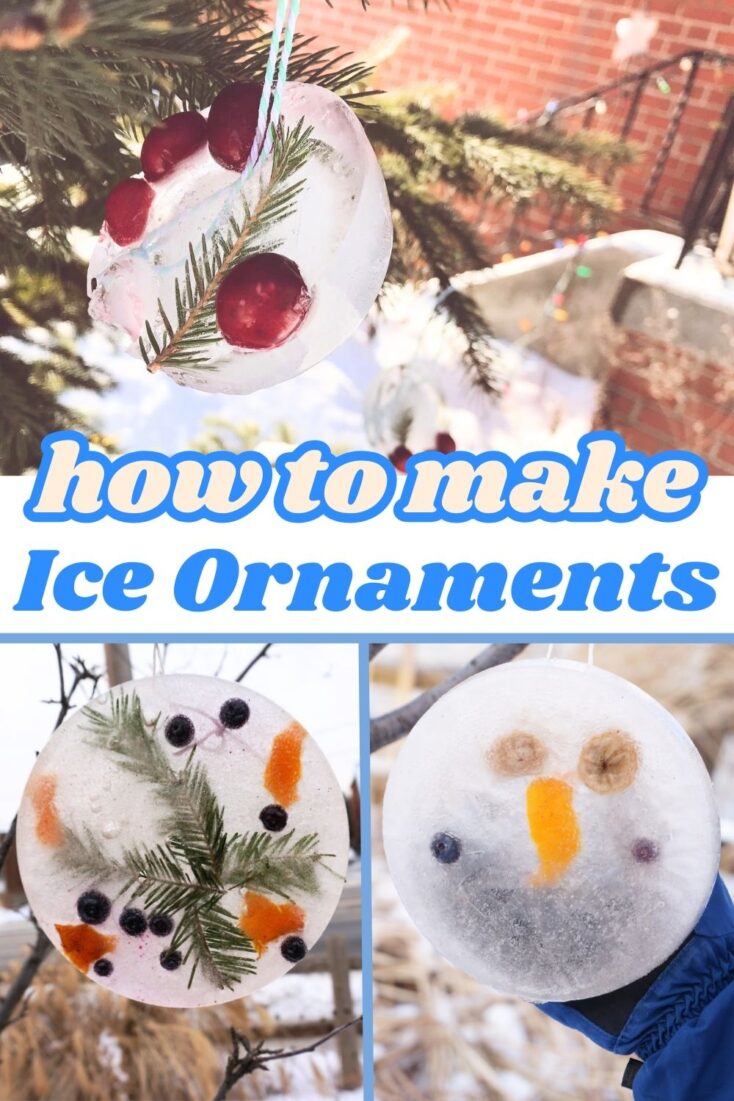
First, we gathered up our supplies. We used flat-bottomed plastic containers and an ice cube tray to freeze the ornaments in. We collected branches from our discarded Christmas tree, frozen banana slices, blueberries, and orange peels. We felt it was important to use things that could be eaten by wildlife and would decompose once the ornaments melted on our front lawn. We also needed kitchen string and scissors...to make the hangers for our ornaments.
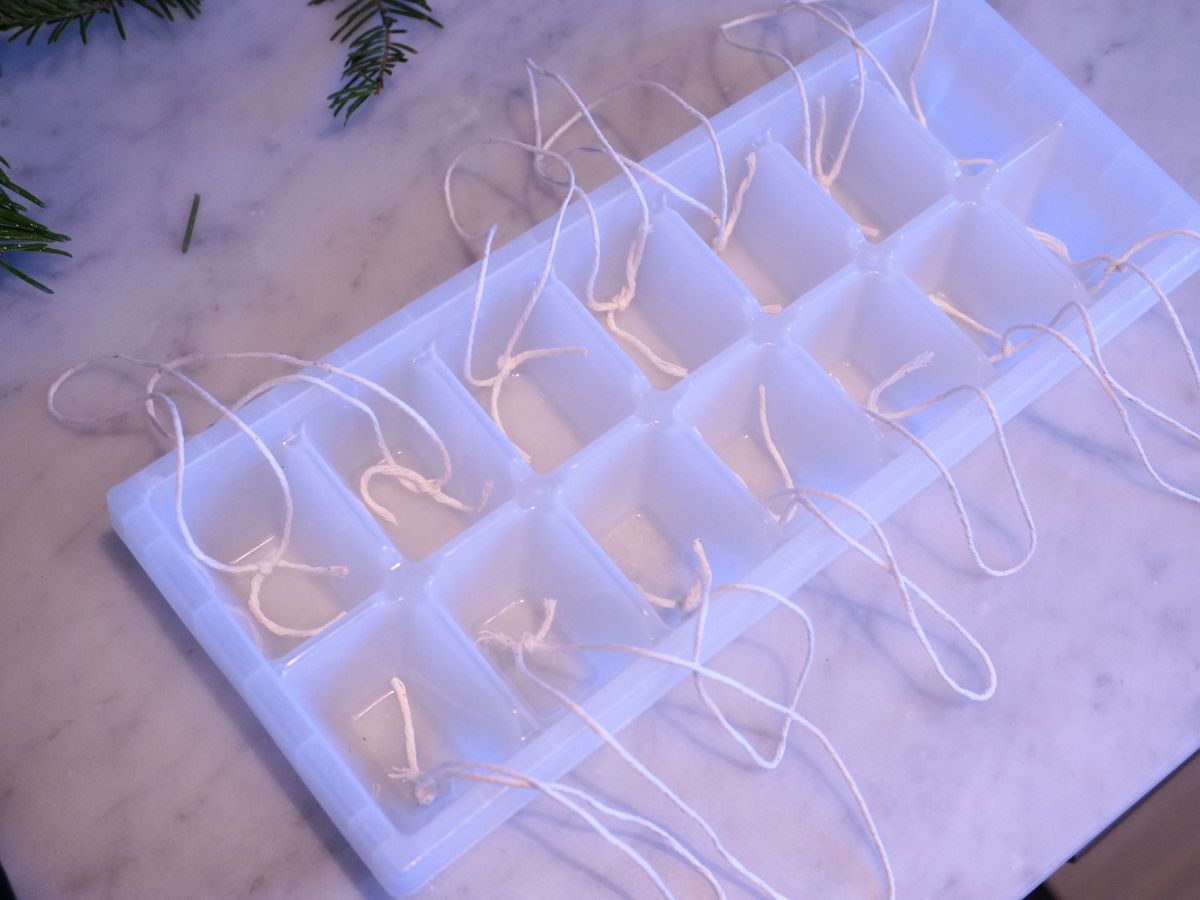
Next, we cut and tied our kitchen string into loops and placed them partially in the plastic containers...but left part of the loop hanging outside of the container. Make sure you leave a loop large enough to hang the ornaments on your branches.
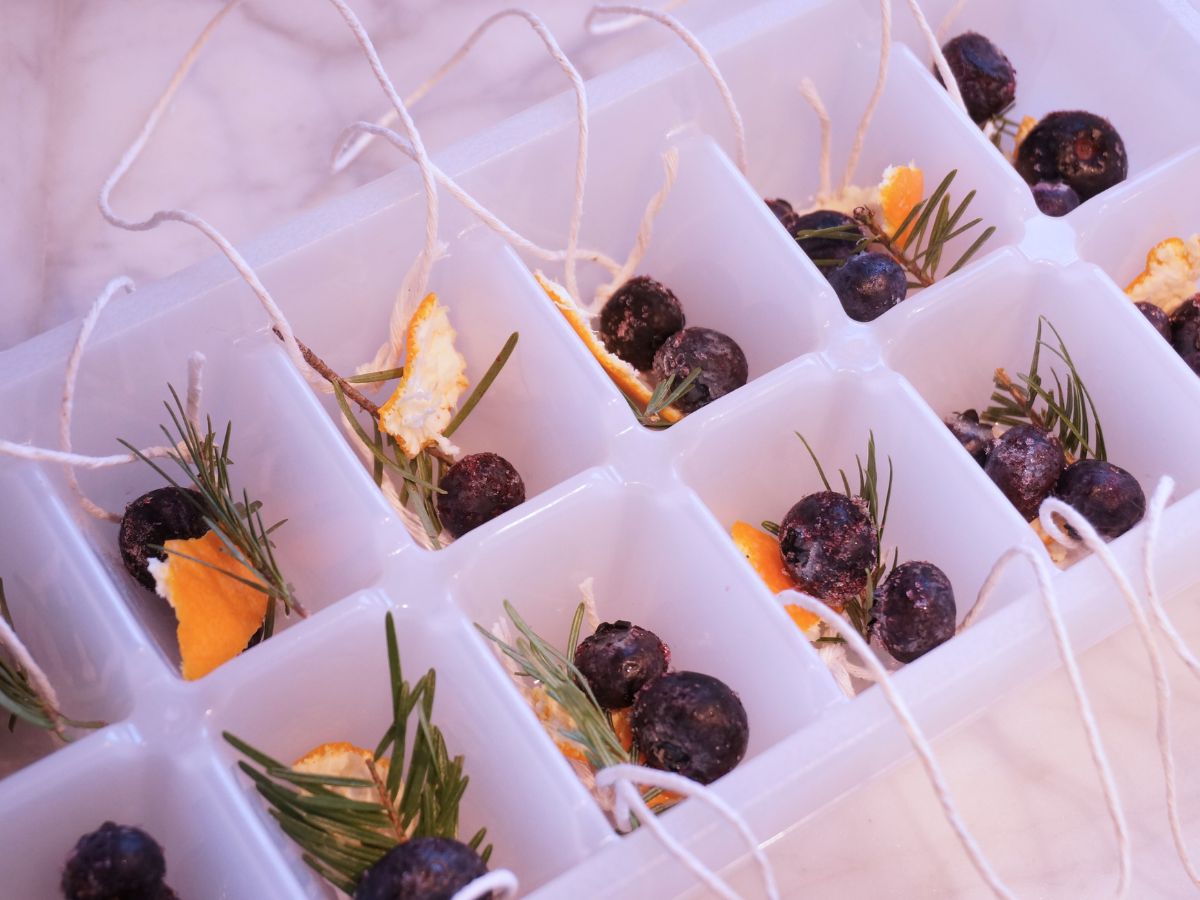
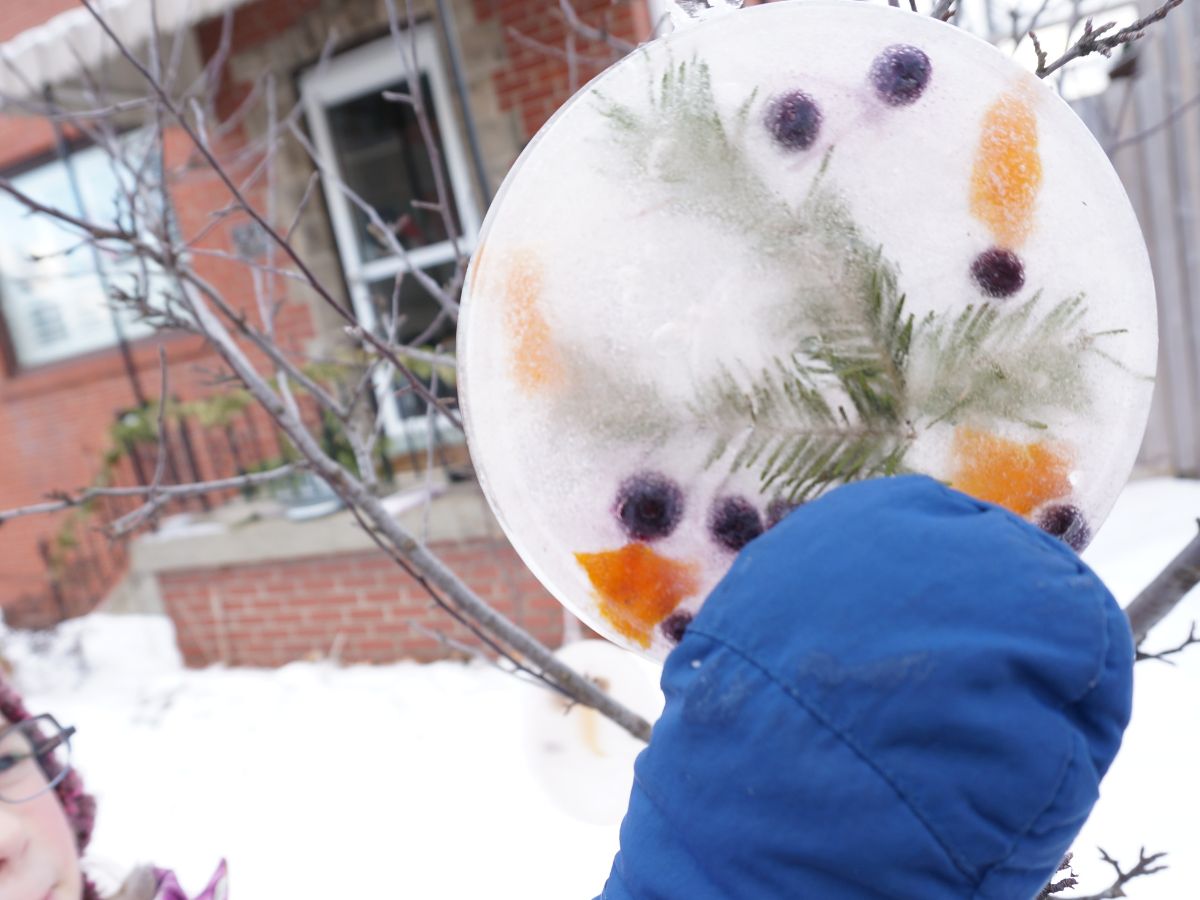
Once our supplies were gathered and the strings were in place, we set to work filling our containers. My youngest daughter is obsessed with owls at the moment, so she used the banana pieces and some orange peel to make an owl face in one of the containers. The one I created was filled with blueberries, orange peel, branches, and banana. Have fun with it and fill the containers with as much or as little as you like.
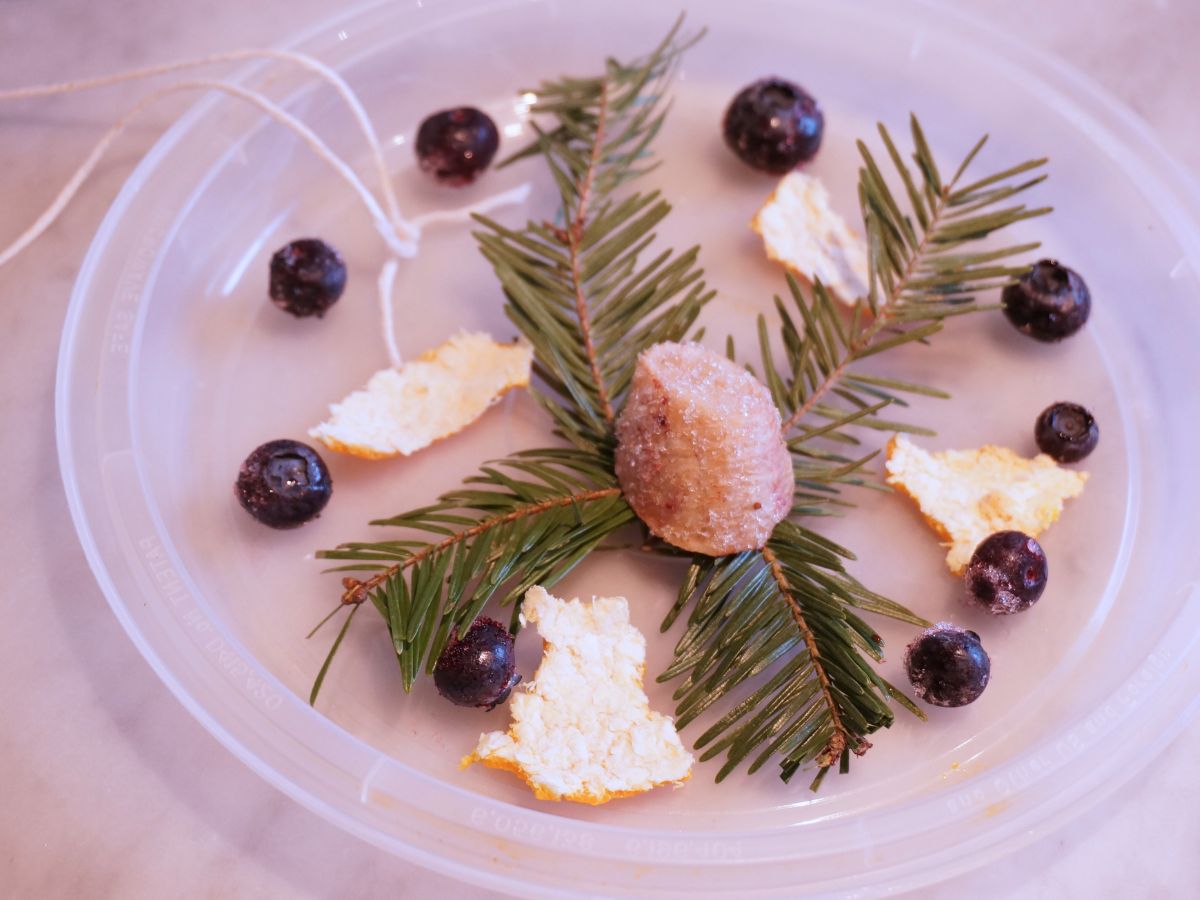
Then we carefully filled the containers with water. Pouring the water slowly and directly onto the items in the containers helped the designs stay in place.
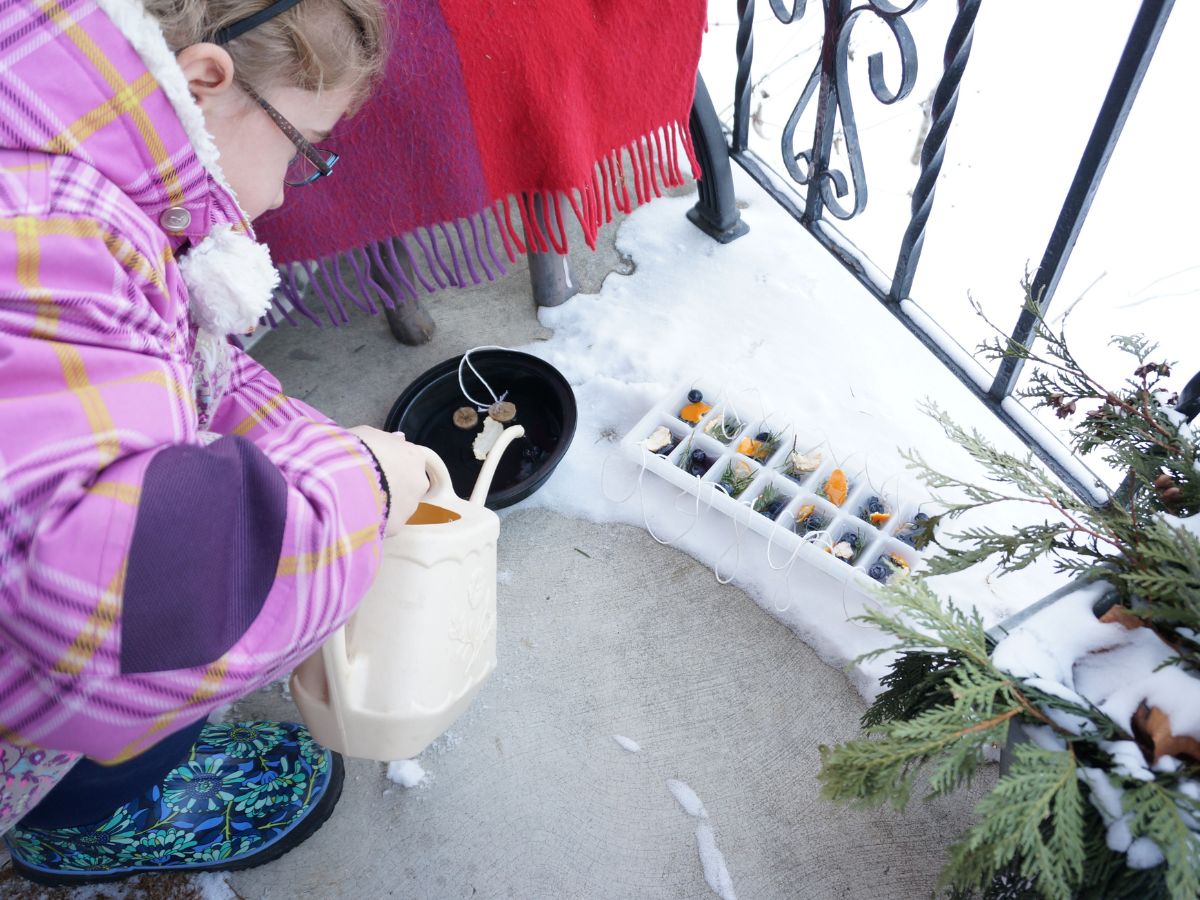
Finally, the containers were placed on our front porch to freeze. It only took a few hours for ours to freeze. Depending on where you live, you may need to leave your ice ornaments out overnight. Make sure they aren't in direct sunlight, even the winter sun is quite warm.

Once everything was frozen we set about popping the ice ornaments out of the containers. The owl turned out really well, better than I expected.
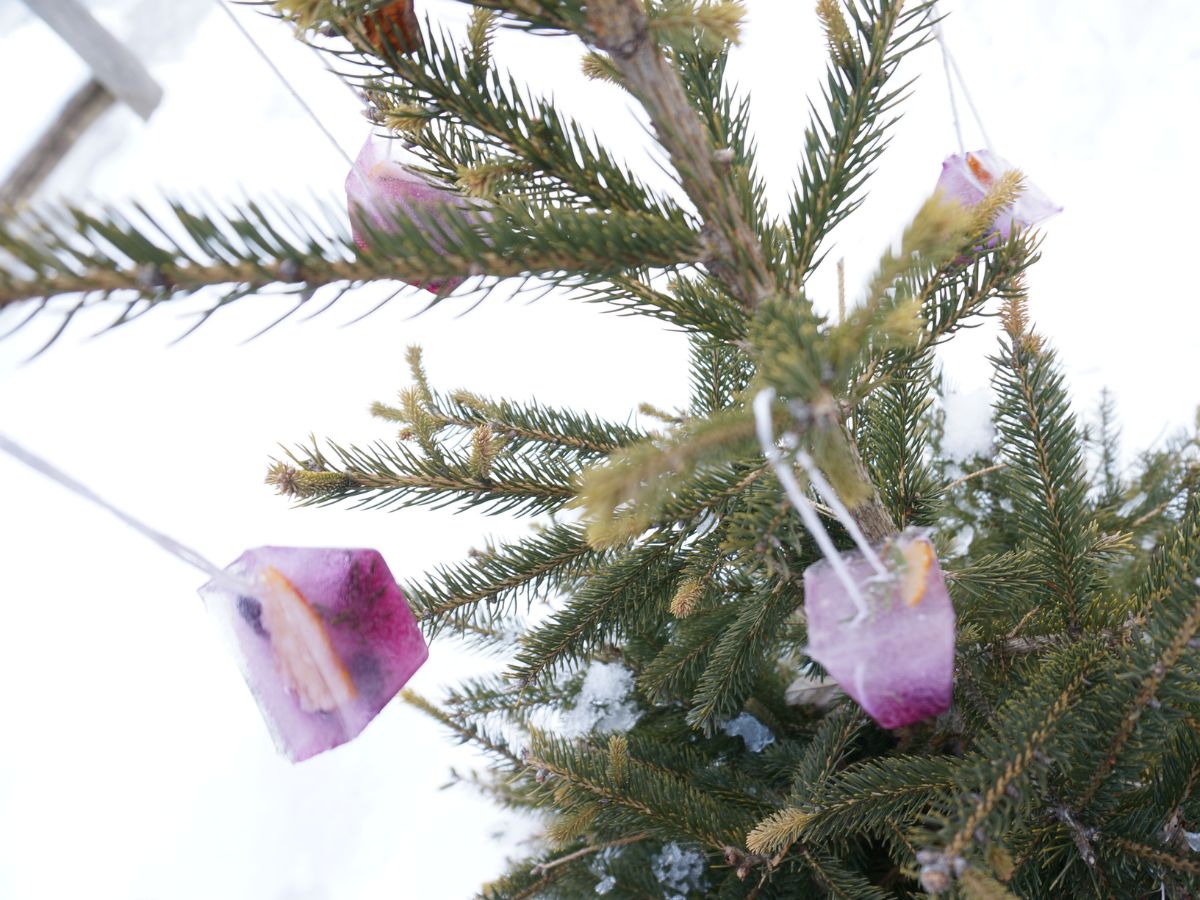
The ice cube tray ornaments hang perfectly on our little evergreen tree. I love how the ice ornaments swing in the trees.
These ice ornaments were simple to make. I wish I could have fully captured the joy this activity brought my daughter. We had such a great time making, waiting, and hanging our ice ornaments.
Update! We first made these ice ornaments many years ago and I make a new batch every winter. Most recently, I made ice ornaments in a metal muffin tin. I used the same steps as above. This time I use cranberries too!
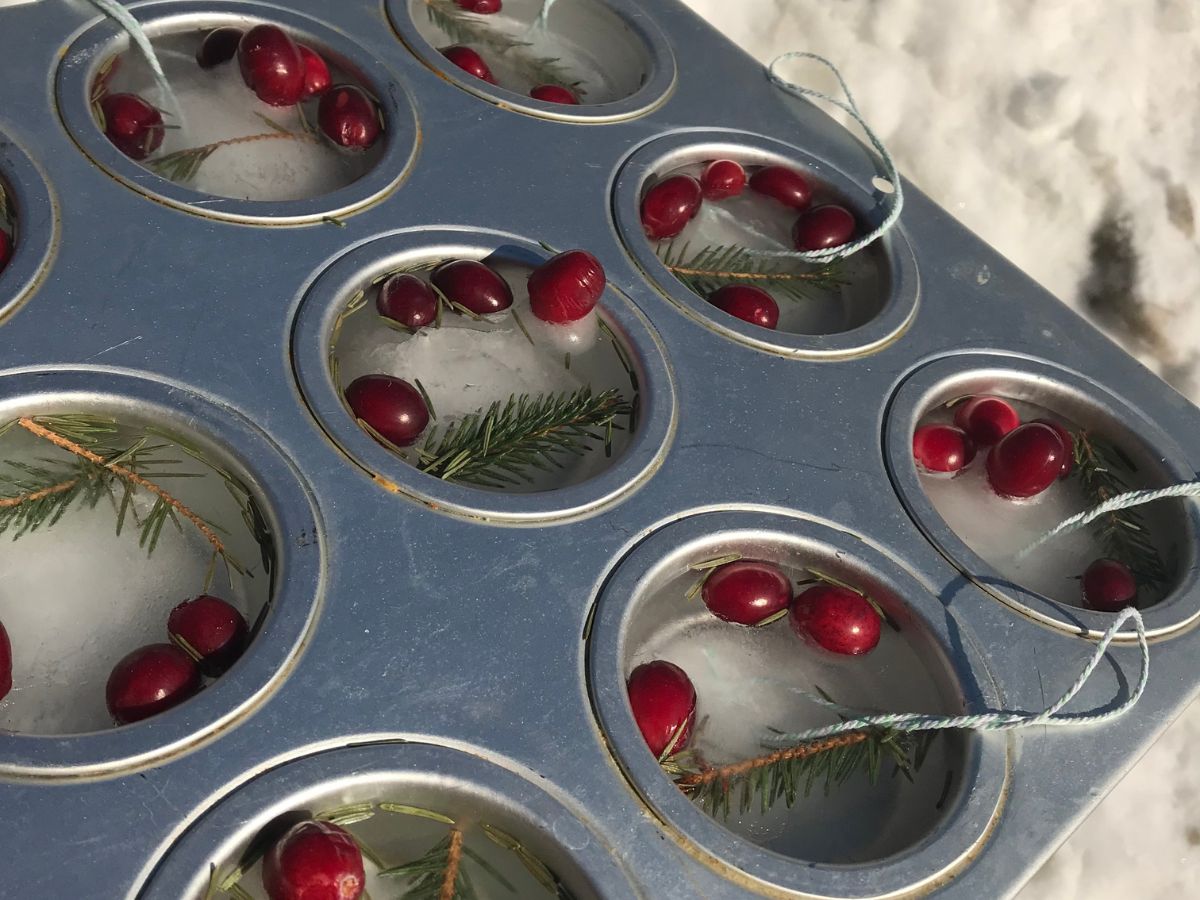
After a few hours sitting on my front porch, they were ready to pop out and hang. If you have trouble getting them out of the muffin tin, bring it inside and let it warm up a little.
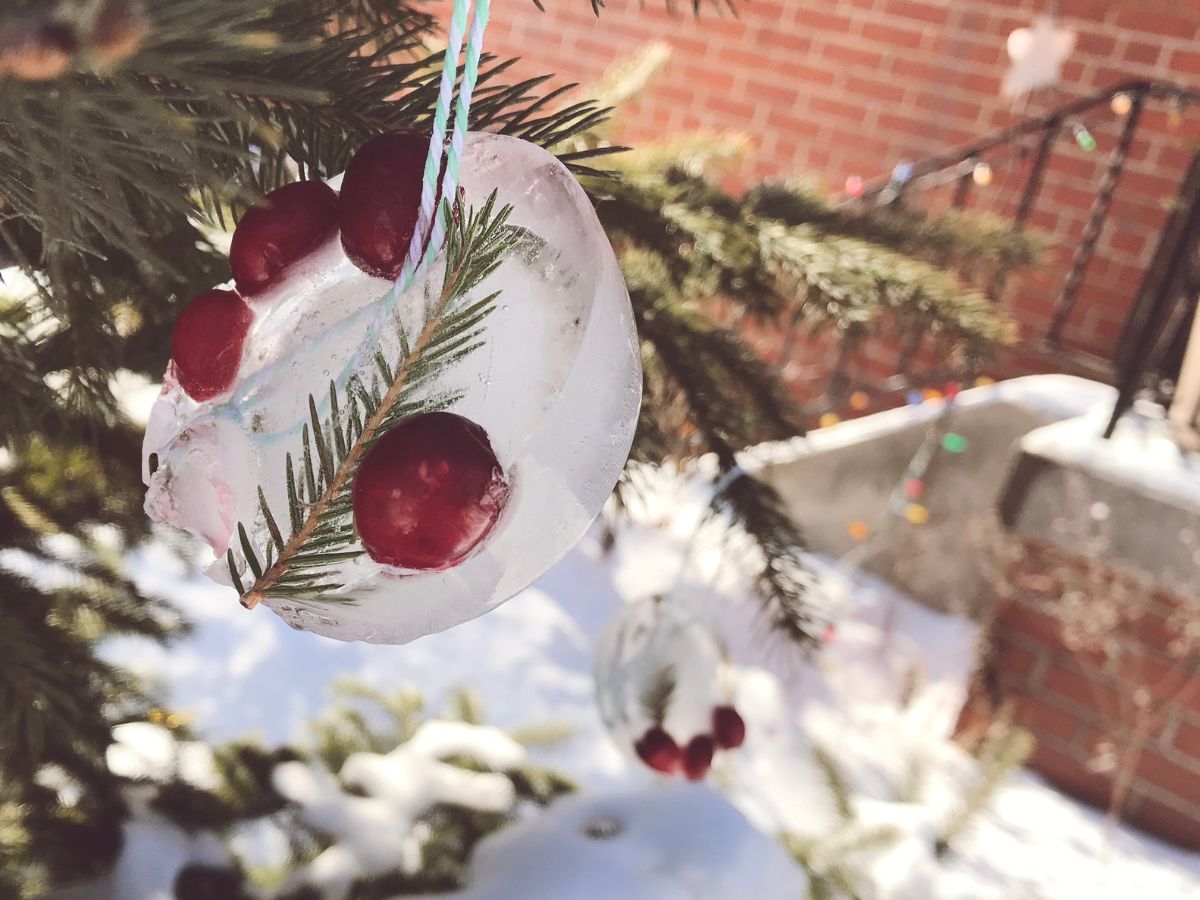
I absolutely love how these little circular ice ornaments turned out. The lesson learned is, that all you need is freezing temperatures, water, and a container to make beautiful ice art at home!
Make sure you are following along...
FOLLOW KITCHEN COUNTER CHRONICLES ON
SUBSCRIBE TO KITCHEN COUNTER CHRONICLES TO HAVE OUR DELICIOUS RECIPES, FUN CRAFTS & ACTIVITIES DELIVERED DIRECTLY TO YOUR INBOX.